Cheap NAS with ZFS in HP MicroServer N40L

I’ve ran Solaris / OpenIndiana machines in my home for years and I just recently had to get a new one because my old server with 12 disk slots made way too much noise and consumed way too much power to my taste. Luckily hard disk sizes have grown up a big time and I could replace the old server with a smaller one and with smaller amount of disks.
hp-microserver

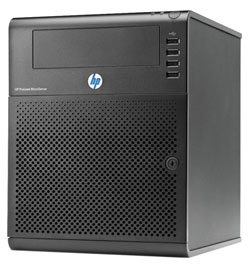
I only recently learn about the HP MicroServer product family. HP has been making these small little servers for a few years and they are really handy and really cheap for their features. I bought a HP MicroServer N40L from amazon.de, which shipped from Germany to Finland in just a week for just 242 euros. Here’s a quick summary about the server itself:

  • It’s small, quiet and doesn’t use a lot of power. According to some measurements it will use on average around 40 to 60W.
  • It has four 3.5″ non-hot-swap disk slots inside. In addition, it has eSATA on the back and a 5.25″ slot with SATA cable. These can give you two extra sata slots for total of six disks.
  • A dual core AMD Turion II Neo N40L (1.5 Ghz) processor. More than enough for a storage server.
  • It can fit two ECC dimms, totaling maximum of 8 GB memory. According to some rumors, you can fit it with two 8GB dimms to get total of 16 GB.
  • Seven USB:s. Two on the back, four on the front and one inside the chassis, soldered right into the motherboard.
  • Depending on disks and configuration, it can stretch up to 12 TB of usable disk space (assuming you install five 4TB disks) with still providing enough security to handle two simultaneous disk failures!

The machine doesn’t have any RAID features, which doesn’t mind me, because my choice of weapon was to install OpenIndiana which comes with the great ZFS filesystem, among other interesting features. If you are familiar with Linux, you can easily learn how to manage an OpenIndiana installation, it’s really easy. ZFS itself is a powerful modern filesystem which combines the best features of software raid, security, data integrity and easy administration. OpenIndiana allows you to share the space with Samba/CIFS to Windows and with AppleTalk to your Macintosh. It also supports exporting volumes with iSCSI, it provides filesystem backups with ZFS snapshots and it even can be used as storage for your Macintosh Time Machine backups. You can read more about ZFS from the Wikipedia entry.

There’s a few different product packages available: I picked the one which comes with one 4GB ECC DIMM, DVD drive and no disks. There’s at least one other package which comes with one 2GB ECC DIMM and one 250GB disk. I personally suggest the following setup where you install the operating system into a small SSD and use the spinning disks only for the data storage.

Shopping list:

  • HP MicroServer N40L with one 4GB ECC DIMM and no disks.
  • Some 60GB SSD disk for operating system. I bought a Kingston 60GB for 60 euros.
  • Three large disks. I had 2TB Hitachi drives on my shelf which I used.
  • One USB memory stick, at least 1GB and an USB keyboard. You need these only during installation.

Quick installation instructions

– First optional step: You can flash a new modified bios firmware which allows getting better performance out of the SSD disk. The instructions are available in this forum thread and in here. Please read the instructions carefully. Flashing BIOS firmware is always a bit dangerous and it might brick your MicroServer, so consider yourself warned.

– Replace the DVD drive with the SSD disk. You can use good tape to attach the SSD disk to the chassis.

– Download the newest OpenIndiana server distribution from http://openindiana.org/download/#text and install it into the USB stick with these instructions.

– Insert the USB stick with OpenIndiana into the MicroServer and boot the machine. During the setup you can change how the SSD disk is partitioned for the OS: I changed the default settings so that the OS partition was just 30GB. This is more than enough for the basic OS. My plan is to later experiment with a 25GB slice as an L2ARC cache partition for the data disks and to leave 5GB unprovisioned. This extra 5GB should give the SSD controller even more room to manage the SSD efficiently and giving it more life time without wearing out. This might sound like a bit of exaggeration, but I’m aiming to minimize the required maintenance with sacrificing some disk space.

– After installation shutdown the server, remove the USB stick and install your data disks. My choise was to use three 2TB disks in a mirrored pool. This means that I can lose two disks at the same time, giving me a good time margin to replace the failed drive. You can read some reasoning why I wanted to have triple way mirroring from this article. If you populate the drive slots from left to right, the leftmost drive will be c4t0d0, the second-from-the-left c4t1d0 etc. The exact command should be:

zpool create tank mirror c4t0d0 c4t1d0 c4t2d0

After this the system should look like this:

  
# zpool status
pool: tank
state: ONLINE
config:

        NAME        STATE     READ WRITE CKSUM
        tank        ONLINE       0     0     0
          mirror-0  ONLINE       0     0     0
            c4t0d0  ONLINE       0     0     0
            c4t1d0  ONLINE       0     0     0
            c4t2d0  ONLINE       0     0     0

Now you can create a child filesystems under the /tank storage pool to suit your needs:

# zfs create tank/lifearchive
# zfs create tank/crashplan_backups
# zfs list
NAME                     USED  AVAIL  REFER  MOUNTPOINT
tank                     393G  1.40T    35K  /tank
tank/crashplan_backups  18.8G  1.40T  18.8G  /tank/crashplan_backups
tank/lifearchive         133G  1.40T   133G  /tank/lifearchive

Here I created two filesystems: One for crashplan backups from other machines and other for storing all my important digital heritage. Next I wanted to export this filesystem to Windows via the Samba sharing system:

# zfs set "sharesmb=name=lifearchive" tank/lifearchive
echo "other password required pam_smb_passwd.so.1 nowarn" >> /etc/pam.conf

In addition I had to add this line to /etc/pam.conf and change my password with “passwd” command after adding that line. Now you should be able to browse the lifearchive filesystem from windows.

Few additional steps you probably want to do:

Now when you got your basic system working you can do a few tricks to get it to work even better. Before you continue, snapshot your current state as explained in the next chapter:

Snapshot your root filesystem

After you’ve done everything as you want you should snapshot this situation as a new boot environment. This way if you do something very stupid and you render your system unusable, you can always boot the machine to the snapshotted state. The command “beadm create -e openindiana openindiana-baseline” will do the trick. Read here what it actually does! Note that this does not cover your data pool, so you might also want to create some snapshot backup system for that. Googling for “zfs snapshot backup script” should get you started.

Email alerts

Verify that you can send email out from the box, so that you can get alerts if one of your disk breaks. You can try this with for example the command “mail your.email@gmail.com”. Type your email and press Ctrl-D to send the email. At least in gmail your email might end up in the spam folder. My choice was to install Postfix and configure it to relay emails via the Google SMTP gateway. The exact steps are beyond the scope of this article, but here’s few tips:

  1. First configure to use SFE repositories: http://wiki.openindiana.org/oi/Spec+Files+Extra+Repository
  2. Stop sendmail: “svcadm disable sendmail”
  3. Remove sendmail: “pkg uninstall sendmail”
  4. Install postfix with “pkg install postfix”
  5. Follow these steps http://carlton.oriley.net/blog/?p=31 – at least the PKI certificate part is confusing. You need to read some documentation around the net to get this part right.
  6. Configure the FMA system to send email alerts with these instructions. Here’s also some other instructions which I used.

Backup your data

I’ve chosen to use Crashplan to back up my data to the Crashplan cloud and to another server over the internet. In addition I use Crashplan to backup my workstation into this NAS – that’s what the /tank/crashplan_backups filesystem was for.

Periodic scrubbing for the zpool

ZFS has a nice feature called scrubbing: This operation will scan over all stored data and verify that each and every byte in each and every disk is stored correctly. This will alert you from a possible upcoming disk breakage when there’s yet no permanent damage. The command is “zpool scrub tank” where “tank” is the name of the zpool. You should setup a crontab operation to do this every week. Here’s one guide how to do it: http://www.nickebo.net/periodic-zpool-scrubbing/

Adding new storage tank with diskmap.py.

We recently added a bunch of Western Digital 3.0TB Green drives to the enclosure, so that we can run a bunch of tests with this brand. Here’s a quick recap what I had to do to make these new disks online.

First run the diskmap.py. the bold lines are my commands which I wrote. First I discover for new drives (it might that the diskmap shows an old cache without the new drivers) and then I ask it to lisk all disks.

root@openindiana:/export/home/garo# diskmap.py
Diskmap - openindiana> discover
Diskmap - openindiana> disks
0:02:00 c2t5000C5003EF23025d0 ST33000651AS 3.0T Ready (RDY) tank: raidz3-0
0:02:01 c2t5000C5003EEE6655d0 ST33000651AS 3.0T Ready (RDY) tank: raidz3-0
0:02:02 c2t5000C5003EE17259d0 ST33000651AS 3.0T Ready (RDY) tank: raidz3-0
0:02:03 c2t5000C5003EE16F53d0 ST33000651AS 3.0T Ready (RDY) tank: raidz3-0
0:02:04 c2t5000C5003EE5D5DCd0 ST33000651AS 3.0T Ready (RDY) tank: raidz3-0
0:02:05 c2t5000C5003EE6F70Bd0 ST33000651AS 3.0T Ready (RDY) tank: raidz3-0
0:02:06 c2t5000C5003EEF8E58d0 ST33000651AS 3.0T Ready (RDY) tank: raidz3-0
0:02:07 c2t5000C5003EF0EBB8d0 ST33000651AS 3.0T Ready (RDY) tank: raidz3-0
0:02:08 c2t5000C5003EF0F507d0 ST33000651AS 3.0T Ready (RDY) tank: raidz3-0
0:02:09 c2t5000C5003EECE68Ad0 ST33000651AS 3.0T Ready (RDY) tank: raidz3-0
0:02:10 c2t5000C5003EF2D1D0d0 ST33000651AS 3.0T Ready (RDY) tank: spares
0:02:12 c2t5000C5003EEEBC8Cd0 ST33000651AS 3.0T Ready (RDY) tank: spares
0:02:13 c2t5000C5003EE49672d0 ST33000651AS 3.0T Ready (RDY) tank: spares
0:02:14 c2t5000C5003EEE7F2Ad0 ST33000651AS 3.0T Ready (RDY) tank: raidz3-0
0:02:15 c2t5000C5003EED65BBd0 ST33000651AS 3.0T Ready (RDY)
0:03:10 c2t50014EE2B1158E58d0 WDC WD30EZRX-00M 3.0T Ready (RDY)
0:03:11 c2t50014EE2B11052C3d0 WDC WD30EZRX-00M 3.0T Ready (RDY)
0:03:12 c2t50014EE25B963A7Ed0 WDC WD30EZRX-00M 3.0T Ready (RDY)
0:03:13 c2t50014EE2B1101488d0 WDC WD30EZRX-00M 3.0T Ready (RDY)
0:03:14 c2t50014EE2B0EBFF8Ad0 WDC WD30EZRX-00M 3.0T Ready (RDY)
0:03:15 c2t50014EE25BBB4F91d0 WDC WD30EZRX-00M 3.0T Ready (RDY)
0:03:16 c2t50014EE2066AB19Fd0 WDC WD30EZRX-00M 3.0T Ready (RDY)
0:03:17 c2t50014EE25BBFCAB0d0 WDC WD30EZRX-00M 3.0T Ready (RDY)
0:03:18 c2t50014EE2066686C6d0 WDC WD30EZRX-00M 3.0T Ready (RDY)
0:03:19 c2t50014EE2B1158F6Fd0 WDC WD30EZRX-00M 3.0T Ready (RDY)
0:03:20 c2t50014EE2B0E99EA1d0 WDC WD30EZRX-00M 3.0T Ready (RDY)
1:01:00 c2t50015179596901EBd0 INTEL SSDSA2CT04 40.0G Ready (RDY) rpool: mirror-0
1:01:01 c2t50015179596A488Cd0 INTEL SSDSA2CT04 40.0G Ready (RDY) rpool: mirror-0
Drives : 28 Total Capacity : 78.1T
Diskmap - openindiana>

I colored the new disk ids with yellow for your reading pleasure. Next I copied all those 11 ids and I formed the following command, which creates a new tank. I also reused the three old spares, those disk ids are marked with green

zpool create tank2 raidz3 c2t50014EE2B1158E58d0 ... c2t5000C5003EE49672d0 spares c2t5000C5003EF2D1D0d0 c2t5000C5003EEEBC8Cd0 c2t5000C5003EE49672d0

All set! I could now access the new 30TB volume under /tank2.

Building a 85TB cheap storage server with Solaris OpenIndiana

I just recently built a storage server based on Solaris OpenIndiana, a 2U SuperMicro server and a SuperMicro 45 disk JBOD rack enclosure. The current configuration can host 84 TB of usable disk space, but we plan to extend this at least to 200TB in the following months. This blog entry describes the configuration and steps how to implement such beast by yourself.

Goal:

  • Build a cheap storage system capable of hosting 200TB of disk space.
  • System will be used to archive data (around 25 GB per item) which is written once and then accessed infrequently (once every month or so).
  • System must be tolerant to disk failures, hence I preferred raidz3 which can handle a failure of three disks simultaneously.
  • The capacity can be extended incrementally by buying more disks and more enclosures.
  • Each volume must be at least 20TB, but doesn’t have to be necessarily bigger than that.
  • Option to add a 10GB Ethernet card in the future.
  • Broken disks must be able to identify easily with a blinking led.

I choose to deploy an OpenIndiana based system which uses SuperMicro enclosures to host cheap 3TB disks. Total cost of the hardware with one enclosure was around 6600 EUR (2011 Dec prices) without disks. Storing 85TB would cost additional 14000 EUR with current very expensive (after the Thailand floods) disk prices. Half a year ago the the same disks would have been about half of that. Disks would be deployed in a 11-disk raidz3 sets, one or two per zpool. This gives us about 21.5TB per 11 disk set. New storage is added as a new zpool instead of attaching it to an old zpool.

Parts used:

  • The host is based on a Supermicro X8DTH-6F server motherboard with two Intel Xeon E5620 4-core 2.4 Ghz CPUs and 48 GB of memory. Our workload didn’t need more memory, but one could easily add more.
  • Currently one SC847E16-RJBOD1 enclosure. This densely packed 4U chassis can fit a whopping 45 disks.
  • Each chassis is connected to a LSI Logic SAS 9205-8e HBA controller with two SAS cables. Each enclosure has two backplanes, so both backplanes are connected to the HBA with one cable.
  • Two 40GB Intel 320-series SSDs for the operating system.
  • Drives from two different vendor so that we can have some benchmarks and tests before we commit to the 200TB upgrade:
    • 3TB Seagate Barracuda XT 7200.12 ST33000651AS disks
    • Western Digital Caviar Green 3TB disks

It’s worth to note that this system is built for storing large amounts of data which are not frequently accessed. We could easily add SSD disks as L2ARC caches and even a separated ZIL (for example the 8 GB STEC ZeusRAM DRAM, which costs around 2200 EUR) if we would need faster performance for example database usage. We selected disks from two different vendors for additional testing. One zpool will use only disks of a single type. At least the WD Green drives needs a firmware modification so that they don’t park their heads all the time.

Installation:

OpenIndiana installation is easy: Create a bootable CD or a bootable USB and boot the machine with just the root devices attached. The installation is very simple and takes around 10 minutes. Just select that you install the system to one of your SSDs with standard disk layout. After your installation is completed and you have booted the system, follow these steps to make the another ssd bootable.

Then setup some disk utils under /usr/sbin. You will need these utils to for example identify the physical location of a broken disk in the enclosure. (read more here):

Now it’s time to connect your enclosure to the system with the SAS cables and boot it. OpenIndiana should recognize the new storage disks automatically. Use the diskmap.py to get a list of the disk identifies for later zpool create usage:

garo@openindiana:/tank$ diskmap.py
Diskmap - openindiana> disks
0:02:00 c2t5000C5003EF23025d0 ST33000651AS 3.0T Ready (RDY)
0:02:01 c2t5000C5003EEE6655d0 ST33000651AS 3.0T Ready (RDY)
0:02:02 c2t5000C5003EE17259d0 ST33000651AS 3.0T Ready (RDY)
0:02:03 c2t5000C5003EE16F53d0 ST33000651AS 3.0T Ready (RDY)
0:02:04 c2t5000C5003EE5D5DCd0 ST33000651AS 3.0T Ready (RDY)
0:02:05 c2t5000C5003EE6F70Bd0 ST33000651AS 3.0T Ready (RDY)
0:02:06 c2t5000C5003EEF8E58d0 ST33000651AS 3.0T Ready (RDY)
0:02:07 c2t5000C5003EF0EBB8d0 ST33000651AS 3.0T Ready (RDY)
0:02:08 c2t5000C5003EF0F507d0 ST33000651AS 3.0T Ready (RDY)
0:02:09 c2t5000C5003EECE68Ad0 ST33000651AS 3.0T Ready (RDY)
0:02:11 c2t5000C5003EF2D1D0d0 ST33000651AS 3.0T Ready (RDY)
0:02:12 c2t5000C5003EEEBC8Cd0 ST33000651AS 3.0T Ready (RDY)
0:02:13 c2t5000C5003EE49672d0 ST33000651AS 3.0T Ready (RDY)
0:02:14 c2t5000C5003EEE7F2Ad0 ST33000651AS 3.0T Ready (RDY)
0:03:20 c2t5000C5003EED65BBd0 ST33000651AS 3.0T Ready (RDY)
1:01:00 c2t50015179596901EBd0 INTEL SSDSA2CT04 40.0G Ready (RDY) rpool: mirror-0
1:01:01 c2t50015179596A488Cd0 INTEL SSDSA2CT04 40.0G Ready (RDY) rpool: mirror-0
Drives : 17 Total Capacity : 45.1T

Here we have total of 15 disks. We’ll use 11 of them to for a raidz3 stripe. It’s important to have the correct amount of drivers in your raidz configurations to get optimal performance with the 4K disks. I just simply selected the first 11 disks (c2t5000C5003EF23025d0, c2t5000C5003EEE6655d0, … , c2t5000C5003EF2D1D0d0) and created a new zpool with them and also added three spares for the zpool:

zpool create tank raidz3 c2t5000C5003EF23025d0, c2t5000C5003EEE6655d0, ... , c2t5000C5003EF2D1D0d0
zpool add tank spare c2t5000C5003EF2D1D0d0 c2t5000C5003EEEBC8Cd0 c2t5000C5003EE49672d0

This resulted in a nice big tank:

        NAME                       STATE     READ WRITE CKSUM
        tank                       ONLINE       0     0     0
          raidz3-0                 ONLINE       0     0     0
            c2t5000C5003EF23025d0  ONLINE       0     0     0
            c2t5000C5003EEE6655d0  ONLINE       0     0     0
            c2t5000C5003EE17259d0  ONLINE       0     0     0
            c2t5000C5003EE16F53d0  ONLINE       0     0     0
            c2t5000C5003EE5D5DCd0  ONLINE       0     0     0
            c2t5000C5003EE6F70Bd0  ONLINE       0     0     0
            c2t5000C5003EEF8E58d0  ONLINE       0     0     0
            c2t5000C5003EF0EBB8d0  ONLINE       0     0     0
            c2t5000C5003EF0F507d0  ONLINE       0     0     0
            c2t5000C5003EECE68Ad0  ONLINE       0     0     0
            c2t5000C5003EEE7F2Ad0  ONLINE       0     0     0
        spares
          c2t5000C5003EF2D1D0d0    AVAIL
          c2t5000C5003EEEBC8Cd0    AVAIL
          c2t5000C5003EE49672d0    AVAIL

Setup email alerts:

OpenIndiana will have a default sendmail configuration which can send email to the internet via directly connecting to the destination mail port. Edit your /etc/aliases to add a meaningful destination for your root account and type newaliases after you have done your editing. Then follow this guide and setup email alerts to get notified when you lose a disk.

Snapshot current setup as a boot environment:

OpenIndiana boot environments allows you to snapshot your current system as a backup, so that you can always reboot your system to a known working state. This is really handy when you do system upgrades, or experiment with something new. beadm list shows the default boot environment:

root@openindiana:/home/garo# beadm list
BE Active Mountpoint Space Policy Created
openindiana NR / 1.59G static 2012-01-02 11:57
There we can see our default openindiana boot environment, which is both active (N) and will be activated upon next reboot (R). The command beadm create -e openindiana openindiana-baseline will snapshot the current environment into new openindiana-baseline which acts as a backup. This blog post at c0t0d0s0 as a lot of additional information how to use the beadm tool.

What to do when a disk fails?

The failure detection system will email you a message when the zfs system detects a problem with system. Here’s an example of the results when we removed a disk on the fly:

Subject: Fault Management Event: openindiana:ZFS-8000-D3
SUNW-MSG-ID: ZFS-8000-D3, TYPE: Fault, VER: 1, SEVERITY: Major
EVENT-TIME: Mon Jan 2 14:52:48 EET 2012
PLATFORM: X8DTH-i-6-iF-6F, CSN: 1234567890, HOSTNAME: openindiana
SOURCE: zfs-diagnosis, REV: 1.0
EVENT-ID: 475fe76a-9410-e3e5-8caa-dfdb3ec83b3b
DESC: A ZFS device failed. Refer to http://sun.com/msg/ZFS-8000-D3 for more information.
AUTO-RESPONSE: No automated response will occur.
IMPACT: Fault tolerance of the pool may be compromised.
REC-ACTION: Run ‘zpool status -x’ and replace the bad device.

Log into the machine and execute zpool status to get detailed explanation which disk has been broken. You should also see that a spare disk has been activated. Look up the disk id (c2t5000C5003EEE7F2Ad0 in this case) from the print.

        NAME                       STATE     READ WRITE CKSUM
        tank                       ONLINE       0     0     0
          raidz3-0                 ONLINE       0     0     0
            c2t5000C5003EF23025d0  ONLINE       0     0     0
            c2t5000C5003EEE6655d0  ONLINE       0     0     0
            c2t5000C5003EE17259d0  ONLINE       0     0     0
            c2t5000C5003EE16F53d0  ONLINE       0     0     0
            c2t5000C5003EE5D5DCd0  ONLINE       0     0     0
            c2t5000C5003EE6F70Bd0  ONLINE       0     0     0
            c2t5000C5003EEF8E58d0  ONLINE       0     0     0
            c2t5000C5003EF0EBB8d0  ONLINE       0     0     0
            c2t5000C5003EF0F507d0  ONLINE       0     0     0
            c2t5000C5003EECE68Ad0  ONLINE       0     0     0
            spare-10
              c2t5000C5003EEE7F2Ad0  UNAVAIL       0     0     0  cannot open
              c2t5000C5003EF2D1D0d0 ONLINE       0     0     0 132GB resilvered
        spares
          c2t5000C5003EF2D1D0d0    INUSE     currently in use
          c2t5000C5003EEEBC8Cd0    AVAIL
          c2t5000C5003EE49672d0    AVAIL

Start the diskmap.py and execute command “ledon c2t5000C5003EEE7F2Ad0″. You should now see a blinking red led on the broken disk. You should also try to unconfigure the disk first via cfgadm: Type cfgadm -al to get a list of your configurable devices. You should find your faulted disk from a line like this:

c8::w5000c5003eee7f2a,0        disk-path    connected    configured   unknown

Notice that our disk id in zpool status was c2t5000C5003EEE7F2Ad0, so it will show in the cfgadm print as “c8::w5000c5003eee7f2a,0″. Now try and type cfgadm -c unconfigure c8::w5000c5003eee7f2a,0 I’m not really sure is this part needed, but our friends at #openindiana irc channel recommended doing this.

Now remove the physical disk which is blinking the red led and plug a new drive back. OpenIndiana should recognize the disk automatically. You can verify this by running dmesg:

genunix: [ID 936769 kern.info] sd17 is /scsi_vhci/disk@g5000c5003eed65bb
genunix: [ID 408114 kern.info] /scsi_vhci/disk@g5000c5003eed65bb (sd17) online

Now start diskmap.py, run discover and then disks and you should see your new disk c2t5000C5003EED65BBd0. Now you need to replace the faulted device with thew new one: zpool replace tank  c2t5000C5003EEE7F2Ad0 c2t5000C5003EED65BBd0. The zpool should now start resilvering the new replacement disk. The spare disk is still attached and must be manually removed after the resilvering is completed: zpool detach tank  c2t5000C5003EF2D1D0d0. There’s more info and examples at the Oracle manuals which you should read.

As you noted, there’s a lot manual operations which needs to be done. Some of these can be automated and the rest can be scripted. Consult at least the zpool man page to know more.

Benchmarks:

Simple sequential read and write benchmark against a 11 disks raidz3 in a single stripe was done with dd if=/dev/zero of=/tank/test bs=4k and monitoring the performance with zpool iostat -v 5

Read performance with bs=4k: 500MB/s
Write performance with bs=4k: 450MB/s
Read performance with bs=128k: 900MB/s
Write performance with bs=128k: 600MB/s

I have not done any IOPS benchmarks, but knowing how the raidz3 works, the IOPS performance should be about the same than one single disk can do. The 3TB Seagate Barracuda XT 7200.12 ST33000651AS can do (depending on threads) 50 to 100 iops. CPU usage tops at about 20% during the sequential operations.

Future:

We’ll be running more tests, benchmarks and watch for general stability in the upcoming months. We’ll probably fill the first enclosure gradually in the new few months with total of 44 disks, resulting around 85TB of usable storage. Once this space runs out we’ll just buy another enclosure, another 9205-8e HBA controller and start filling that.

Update 2012-12-11:

It’s been almost a year after I built this machine to one of my clients and I have to say that I’m quite pleased with this thing. The system has now three tanks of storage, each is a raidz3 spanning over 11 disks. Nearly every disk has worked just fine so far, I think we’ve had just one disk crash during the year. The disk types reported with diskmap.py are “ST33000651AS” and “WDC WD30EZRX-00M”, all 3TB disks. The Linux client side has had a few kernel panics, but I have no idea if those are related to the nfs network stack or not.

One of my reader also posted a nice article at http://www.networkmonkey.de/emulex-fibrechannel-target-unter-solaris-11/ – be sure to check that out also.


SuperMicro JBOD SC847E16-RJBOD1 enclosure with Solaris OpenIndiana

I’ve just deployed a OpenIndiana storage system which uses a SuperMicro JBOD SC847E16-RJBOD1 45 disk enclosure and an LSI Logic SAS 9205-8e HBA controller with OpenIndiana (build 151a). This enclosure allows you to fit huge amount of storage into just 4U rack space.

There’s a great utility called sas2ircu. Together with diskmap.py, these allows you to:

  • Identify where your disks are in your enclosure
  • Toggle the disk locator identify led on and off.
  • Run a smartcl test

So I can now locate my faulted disk with a clear blinking red led so that I can replace it safely.

Installation: Copy both binaries to /usr/sbin and you’re ready to go. Try first running diskmap.py and execute the discover command. Then you can list your disks and their addresses in the enclosure by saying disks.

There’s also the great lsiutil tool available. You need to find the 1.63 version which supports the 9205-8e controller. Unfortunately for some reason LSI has not yet made this tool available on their site. You can download it in the mean time from here: http://www.juhonkoti.net/media/LSIUTIL-1.63.zip

Hotswapping disks in OpenSolaris

Adding new SATA-disks to OpenSolaris is easy and it’s done with cfgadm command line util if the disk is in a normal ACHI SATA controller.  I have also an LSI SAS/SATA controller SAS3081E-R which uses its own utils. 

Hotpluging disk into normal ACHI SATA controller.

First add the new disk to the system and power it on (a good sata backplane is a must) and then type cfgadm to list all disks in the system:

garo@sonas:~# cfgadm
Ap_Id                          Type         Receptacle   Occupant     Condition
c3                             scsi-bus     connected    configured   unknown
pcie20                         unknown/hp   connected    configured   ok
sata4/0::dsk/c5t0d0            disk         connected    configured   ok
sata4/1                        disk         connected    unconfigured unknown
sata4/2                        sata-port    empty        unconfigured ok

This shows that disk sata4/1 is a new disk which have been added but is not yet configured. Type

garo@sonas:~# cfgadm -c configure sata4/1

Now the disks are configured. Typing cfgadm again shows that they have been configured as disks c5t0d0 and c5t1d0. They’re now ready to use in zpools.

Hotswapping disks in LSI SAS/SATA controller

I have also an LSI Logic SAS3081E-R 8-port (i:2xSFF8087) SAS PCI-e x4 SATA controller which can be used with Solaris default drivers, but it should be used with its own drivers (i used the Solaris 10 x86 drivers). After the drivers are installed you can use the lsiutil command line tool.

garo@sonas:~# lsiutil
LSI Logic MPT Configuration Utility, Version 1.61, September 18, 2008

1 MPT Port found

     Port Name         Chip Vendor/Type/Rev    MPT Rev  Firmware Rev  IOC
 1.  mpt0              LSI Logic SAS1068E B3     105      01170200     0

Select a device:  [1-1 or 0 to quit]

First select your controller (I have just one controller, so I’ll select 1). Then you can type 16 to Display attached devices, or 8 to scan for new devices. The driver will automaticly scan for new disks once a while (at least it seems so), so the disk might just pop up available to be used with zpool without you doing anything for it.

Main menu, select an option:  [1-99 or e/p/w or 0 to quit] 8

SAS1068E's links are 1.5 G, 1.5 G, 1.5 G, 1.5 G, 1.5 G, 1.5 G, 1.5 G, 1.5 G

 B___T___L  Type       Vendor   Product          Rev      SASAddress     PhyNum
 0   0   0  Disk       ATA      ST31000340AS     SD15  09221b066c554c66     5
 0   1   0  Disk       ATA      ST31000340AS     SD15  09221b066b7f676a     0
 0   2   0  Disk       ATA      ST31000340AS     SD15  09221b0669794a5d     1
 0   3   0  Disk       ATA      ST31000340AS     SD15  09221b066b7f4e6a     2
 0   4   0  Disk       ATA      ST31000340AS     SD15  09221b066b7f5b6d     3
 0   5   0  Disk       ATA      ST31000340AS     SD15  09221b066a6c6068     4
 0   6   0  Disk       ATA      ST3750330AS      SD15  0e221f04756c7148     6
 0   7   0  Disk       ATA      ST3750330AS      SD15  0e221f04758d7f40     7

Miten ZFS toimii levyjen kanssa ja storagepoolin anatomia.

ZFS koostuu yhdestä levypoolista (storagepool). Levypool voi sisältää yhden tai useampia tiedostojärjestelmiä, jotka jakavat yhdessä koko levypoolin tilan. Tiedostojärjestelmien luonti on helppoa ja kevyttä, eli esimerkiksi jokaiselle käyttäjälle voidaan helposti luoda oma tiedostojärjestelmä. Tiedostojärjestelmät voivat muodostaa hierarkioita, tiedostojärjestelmille voidaan asettaa tilarajoituksia (quota), varata tietty miminimäärä tilaa (reserve space) ja tiedostojärjestelmiä voidaan jakaa (export) helposti esimerkiksi windowsiin CIFS-protokollalla (tunnetaan myös nimillä smb ja samba), tai nfs protokollalla. Yhdessä tietokoneessa voi olla useita eri levypooleja. Solaris (ja grub) osaa käynnistyä ZFS:ltä, kunhan levypoolissa ei ole raidz-virtuaalilevyjä.

Yksi levypool koostuu vähintään yhdestä virtuaalilevystä (VDEV). Virtuaalilevyjä voidaan lisätä vapaasti jälkeenpäin levypooliin, mutta niitä ei voida toistaiseksi ottaa pois storagepoolista. Levypoolin koko on sen virtuaalilevyjen kokojen summa. Levyn lisäyksen jälkeen olemassaolevaa dataa ei automaattisesti jaeta tasaisesti kaikille virtuaalilevyille, vaan ainoastaan virtuaalilevyn lisäyksen jälkeen kirjoitettu data jaetaan tasaisesti. Virtuaalilevyn lisäys siis nopeuttaa levyjärjestelmän toimintaa, mutta nopeushyöty ei tule heti esiin vanhalla datalla.

Jos virtuaalilevyssä on useampi kuin yksi levy, virtuaalilevyn koko määräytyy pienimmän fyysisen levyn koon mukaan. Eli jos levyssä on kahden, kolmen ja viiden gigatavun levyt, virtuaalilevyn koko on 2 GT * 3 = 6 GT (tässä ei oteta huomioon peilausta tai raidz:n käyttöä, jolloin levytilaa kuluu virheenkorjauksessa käytettävän pariteettidatan säilytykseen). Kuitenkin jos pienin levy vaihdetaan isommaksi (olettaen, että virtuaalilevy tukee virheenkorjausta, eli on joko peilattu, tai varmennettu raidz:lla), virtuaalilevyn koko kasvaa automaattisesti. Eli jos kahden gigatavun levy vaihdetaan neljän gigatavun levyksi, niin virtuaalilevyn koko muuttuu 12 gigatavuksi (4 GT * 3 levyä).

Virtuaalilevy (VDEV) voi olla:

  • Tiedosto (iso tiedosto joka toimii “levynä”)
  • Levyn slice tai partitio.
  • Kokonainen levy (suositeltavin tapa)
  • Joukko levyjä, joiden välillä tieto peilataan (eli mirror-levysetti)
  • Joukko levyjä jotka muodostavat RAIDZ1 tai RAIDZ2 virtuaalilevyn.
  • Erikoislevy (cache-levy, log-levy tai spare-levy)

Yhdessä levypoolissa voi olla sekoitettuna erilaisia virtuaalilevyjä, mutta tätä ei suositella. Esimerkiksi levypoolissa voi olla raidz1 ja raidz2 -virtuaalilevypakat, mutta tälläisen luonnin yhteydessä käyttäjää varoitetaan ja pyydetään erikseen hyväksymään eri vdev tyyppien sekoittaminen keskenään.

raidz (eli raidz1): Vähintään kolme levyä (jossa levy on tiedosto, slice, partitio tai kokonainen levy (suositeltavin tapa)) ja kestää yhden levyn hajoamisen. Virheenkorjaukseen käytettävä data vie yhden levyn kapasiteetin verran tilaa ja virheenkorjaukseen käytetty data jaetaan tasaisesti kaikille levyille (toimii samalla periaatteella kuin RAID-5). Tällä hetkellä levyjä ei voida lisätä tai poistaa virtuaalilevypakasta, mutta levyjä voidaan vaihtaa yksi kerrallaan isompiin levyihin, jolloin virtuaalilevypakan koko kasvaa. Mikäi virtuaalilevypakka koostuu erikokoisista levyistä, kaikki levyt käyttäytyvät levypakan pienimmän levyn koon mukaan.

raidz2: Vähintään neljä levyä ja kestää kahden levyn hajoamisen. Virheenkorjaukseen käytettävä pariteettidata käyttää kahden levyn kapasiteetin verran tilaa. Nopeampi kuin raidz1, toimii samalla tavalla kuin RAID-6. Käyttäytyy muuten kuten raidz1.

mirror, eli peilattu levysetti: Vähintään kaksi levyä. Kaikki data kopioidaan kaikille levyille, eli levypakasta voi hajota kaikki paitsi yksi levy. Levypakkaan voidaan lisätä levyjä (kunhan ne ovat vähintään samankokoisia kuin levypakan pienin levy) tai poistaa levyjä.

spare, eli varalevy: Oltava vähintään samankokoinen kun koko levypoolin pienin levy (jotta levyä voidaan käyttää varalevynä)

log ja cache -levyt: Erikoistapauksia, kotikäyttäjä ei tarvitse näitä.

Kysymyksiä ja vastauksia NASini toiminnasta.

Olen keskustellut NAS projektistani muropaketissa, jossa esitettiin lukuisia kysymyksiä projektistani:

Q: Miksi RAIDZ1 + spare, eikä RAIDZ2 ilman sparea:
A: Hankin aluksi kolme levyä ja hankin sparen jälkeenpäin. En ole tutustunut, että kumpi olisi parempi ratkaisu. Yksi storagepooli koostuu vähintään yhdesteä levysetistä (esim RAIDZ1 setti, RAIDZ2 setti, peilattu setti tai yksittäinen levy). Jos levysettejä on useampia, niin levysettien pitää (ei kuitenkaan pakko, mutta suositus) olla samanlaisia. Eli samaan storagepooliin ei kannata laittaa RAIDZ1 settiä ja RAIDZ2 settiä, tai RAIDZ1 ja MIRROR-settiä. Kun storagepoolissa on useita settejä, niin samaa sparea voidaan jakaa kaikkien settien kanssa.

Lisäksi spare voidaan ehkä säätää sammumaan kun sitä ei käytetä. En ole varma, olenko saanut tätä jo tehtyä (en ole keksinyt tapaa varmistaa asiaa), mutta sen pitäisi kait olla mahdollista. Eli tällöin levyn rikkoontuessa spare ei olisi pyörinyt tyhjillään, vaan olisi ollut paikallaan varastossa.

Valittaessa RAIDZ2:en ja RAIDZ1 + sparen välillä pitää myös hieman pohtia tehokysymyksiä. En ole varma miten RAIDZ2 käyttäytyy nopeuden suhteen, joku muu saa selvittää.

RAIDZ1:stä ei voi muuttaa jälkeenpäin RAIDZ2:ksi. Storagepoolista ei myöskään toistaiseksi voi ottaa levysettejä pois, eli storagepoolin kokoa ei voi pienentää jälkeenpäin!

Kuitenkin laajennustilanteessa voitaisiin luoda uusi storagepooli uusilla levyillä, siirtää kamat offline tilassa vanhalta poolilta uudelle, poistaa vanha pooli ja siirtää vanhan poolin RAIDZ1 + spare uuteen pooliin RAIDZ2:ena (jos se on mielekästä) ja laittaa vaikka uusi spare, joka sitten jaetaan koko poolin kesken.

Q: Nyt kun sinulla homma jo pyörii, niin olisiko jotain komponenttia, joka tuosta kokoonpanosta kannattaisi vaihtaa / valita toisin?
A: Kyllä. Itselläni oli isoja performanssiongelmia Gigabyten emolevyn sisäänrakennetun Realtek 8111B -verkkopiirin kanssa. Ongelmat korjaantuivat ostamalla 25 euron Intelin PCI Gigabittinen verkkokortti.

Q: Oliko ajureiden kanssa mitään ongelmaa?
A: Ei.

Q: Miten hyvin riittää tehot tossa prossussa?
A: Hyvin. Olen harkinnut mm. virtuaalikoneiden hostaamista koneessa, niitä varmaan menisi sinne

Q: Kuin ison CF:n laitoit?
A: Kaksi kappaletta kahden gigan kortteja. Nexentan asennusohjelmassa on bugi, joka estää suoran asennuksen kahden gigan kortille (valittaa, että “kiintolevy” on muutamaa megatavua liian pieni). Tämä on kierrettävissä, mutta en muista juuri nyt tarkasti miten se tapahtuu. Voin kuitenkin opastaa jos jollakulla tulee sama ongelma esiin ja kirjoitan siitä kunnon ohjeet blogiini.

Solaris osaa bootata ZFS:ltä, mutta vain jos ZFS ei sisällä RAIDZ levypakkoja. Eli tarkoitus oli peilata käyttöjärjestelmä kahdelle eri CF kortille. Jostakin syystä kone tunnistaa vain yhden CF kortin. Jos laitan molemmat kortit sisään, niin kone ei tunnista kumpaakaan. Tällä hetkellä minulla on siis systeemilevy vain yhdellä CF:llä. Jos saan joskus koneen tunnistamaan toisenkin CF kortin, niin voin (ymmärtääkseni) lisätä sen lennossa sisään ja peilata systeemilevyn myös toiselle CF kortille.

Q: Näillä näkymin ois tarkotuksena laittaa 6x500GB levyt raid-z2:lla, mutta saapa nähä mitä sitä lopulta keksii.. Meinaa olla ongelma toi ettei pysty levysettiin lisään uusia levyjä, tällä hetkellä on koneessa 3x500GB (jotka ei oo tyhjiä) niin ois kiva saada ne tohon NAS:siin, mutta pitäis siirtää data väliaikasesti “johonki muualle” eli menee vähän hankalaksi.. :)

A: Voit tehdä esim näin: Luot uuden levypoolin johon laitat 5 levyä RAIDZ2:een. Kopioit datat vanhoilta levyiltä tähän uuteen pooliin. Otat vanhat 500 GB levyt ja lisäksi kuudennen ylijääneen levyn ja lisäät ne yhtenä neljän levyn RAIDZ2 settinä uuteen storagepooliin.

Eli levysettiin ei voi lisätä uusia levyjä, mutta storagepooliin voi lisätä uuden levysetin (jolloin pooli “stipettää” datat levysettien välillä joka lisää performanssia)

Q: Tosin kovalevyiksi olen ajatellut 1T levyjä. Onko suositella jotain tiettyä levyä?
A: En osaa suositella. Kannattaa puntaroida hinta-koko suhteen ja haluttujen levyjen määrän kanssa ja valita optimaalinen kokoonpano levyjä.

Q: Oliko vielä joku tietty syy käyttää kahta erillistä 1GB palikkaa yhden 2GB palikan sijaan?
A: Muistit toimivat dualchannel moodissa, eli nopeammin kuin yksi 2GB palikka,.

Sharing iSCSI volumes from Solaris to Windows XP

I just noticed that I could create iSCSI volumes onto my ZFS pool and share them easily over network to other machines. And I mean easily!

  1. Enable the iSCSI service:
    # svcadm enable iscsitgt
  2. Create a zfs stub for your volumes:
    # zfs create storagepool/volumes
    # zfs set shareiscsi=on storagepool/volumes
  3. Create a volume
    # zfs create -V 20g storagepool/volumes/test
  4. Verify that sharing was successfull:
    # iscsitadm list target
    Target: storagepool/volumes/test
        iSCSI Name: iqn.1986-03.com.sun:02:737cb2f1-ea2b-e6d5-b8af-e335e05852f6
        Connections: 0
  5. Install Microsoft iSCSI Software Initiator Version from here
  6. Go to Control Panel -> iSCSI Initiator -> Discovery, add the solaris server ip to Target Portals, then go to Targets tab and Log On to the volume.
  7. Go to the Computer Management and format the new iSCSI partition and you’re ready to go.

I benchmarked read speeds of 70 to 80 MB/sec with access time of about 2.3 ms over a 1GBps ethernet network. Not bad, could be a bit faster, but the network will anyway be a bottleneck compared to local drivers. My 160 GB RAID-0 stripe gives 260 MB/sec read times with 18.4 ms access time and 300 GB RAID-1 mirror gives 110 MB/sec with 19 ms access time (both are local drivers)

So what I can do with iSCSI volumes? I could for example use them as virtual machine disks, which would allow me to move virtual machines more easily across my network (though I dont have that many machines where to move them). Also the access time is blazingly fast, so I will also try to use them as video editing storage, as suggested in this article.

NAS projekti OpenSolariksella ja ZFS:llä

Speksit:

  • Nexenta OpenSolaris distribuutio
  • Tukee ZFS:ää
  • Aluksi neljä kappaletta 750 gigan Seagate Barracuda 7200.11 levyjä, joista kolme levyä muodostaa raidz1 (Solariksen RAID-5) -setin ja yksi levyistä on varalevy (spare).
  • Hotswap tuki, levyt voidaan vaihtaa lennossa.
  • Boottaus ja itse käyttöjärjesetlmä CompactFlash kortilta. /var osio on levypoolissa, jolloin CF kortille ei tarvitse juuri kirjoitella.
  • Laajennettavissa 13 SATA-levyyn asti.
  • Levytilan jako CIFS (Windowsin levyjako), FTP:n, NFS:n, SSH:n ja WWW:n yli (vain luku).
  • Tukee useita eri käyttäjiä ja tarvittaessa toimii Windows Domainissa.

Setti on kasattu isoon Antecin pelikoteloon, joka valittiin isojen tuulettimien ja ennenkaikkea runsaiden 5.25″ laitepaikkojen takia, joita kotelossa on yhdeksän. Levytilaa jaetaan CIFS:n (eli Samba, eli Windowsin levyjako) avulla ja tarvittaessa myös NFS:llä ja ehkä tulevaisuudessa myös iSCSI:llä (SCSI over Internet).

Nexenta on OpenSolaris-distribuutio, joka on käytännössä Debian OpenSolariksen kernelillä, eli ohjelmia saa helposti apt-get:llä, joka oli merkittävä valintakriteeri itselleni. Tietenkin kaikki asiat eivät toimi kuten Linuxissa, mutta Debianmaisuus teki Solarikseen siirtymisestä helpompaa.

Testeissä ZFS on toiminut erinomaisesti. Kirjoitusnopeus levypakkaan on 120 Mt/s ja lukunopeus noin 180 Mt/s. Verkon yli yhdeltä XP koneelta kirjoitusnopeus on noin 60 Mt/s gigabitin verkon yli (tässä on varmaan vielä parantamisen varaa). Testeissä yhden levyn irroitus on toiminut erinomaisesti, uuden levyn voi lisätä lennossa sisään ja itseasiassa yksi kolmesta levyistä ehti jo hajota ja ZFS hanskasi tilanteen erinomaisesti ilman ongelmia. Levyrikon sattuessa järjestelmä ottaa automaattsisesti varalevyn käyttöön ja lähettää ilmoituksen sähköpostitse. Nykyinen configuraatio antaa 1.3 TB käyttötilaa ja tilaa voi laajentaa helposti lisäämällä uusia kolmen levyn settejä järjestelmään.

Kotelosta on muutamia kuvia kamerassa, lisään ne jossakin välissä. Kokoonpano ei ole erityisen hiljainen, mutta se ei nykyisessä sijoituspaikassa ole ongelma.

Komponenttilista (verkkokaupan tuotekoodit):

  • 0266: Antec Nine Hundred ATX kotelo. 9 5.25″ laitepaikkaa ja ärsyttävät siniset ledit tuulettimissa, jotka sai helposti pimeäksi. 108.90 €
  • 5017: Corsair Twin2X 2x1GB DDR2 800Mhz KIT -muistimodulipari. 43.90 €
  • 8322: Intel Dual Core E2180 2,0GHz -prosessori LGA775-kantaan. 57.90 €
  • 8865: Sandisk 2GB CompactFlash Ultra II muistikortti. 24.90 €
  • 16539: Gigabyte GA-P35-DS3P Intel P35 ATX-emolevy LGA775 -prosessoreille. 8 SATA-väylää. 127.90 €
  • 20028: Antec NeoPower HE High Efficiency 430W -virtalähde. 60.90 €
  • 24126: Seagate Barracuda 7200.11 750GB SATA-II 4 kpl * 120.90 = 483.60 €
  • 30332: Chieftec SNT-2131SATA SATA-kiintolevykehikko. 2 * 61.90 = 123.80 €
  • Lisäksi CompactFlash to IDE adapteri noin 4 euroa.

Yhteensä: 1035.80 €, levytilaa 1.3 TB, noin 80 senttiä per gigatavu (jos on spare-levy), 70 senttiä ilman sparea. Levytilan laajennus nykyhinnoilla 2.6 TB: 424.6, jolloin hinta olisi 56 senttiä per gigatavu, 51 senttiä ilman sparea.

Vertailun vuoksi: Buffalo TeraStation Live 2TB, jolloin hyötytilaa RAID-5-setupissa olisi 1.35 TB. Hinta 731.90 €, hinta per gigatavu: 54 senttiä. Laajennus tapahtuisi ostamalla toinen boksi, jolloin tilaa olisi 2.7 TB ja hinta per gigatavu pysyisi samana, jolloin buffalo olisi omaa NAS boksiani kalliimpi.

Buffalo olisi halvempi, mutta huomattavasti hitaampi ja buffaloa ei voi laajentaa. Buffalo ei myöskään mahdollista spare-levyn käyttöä, eli levyrikon sattuessa järjestelmä on vaarassa kunnes käyttäjä vaihtaa itse rikkinäisen levyn. Solariksen ZFS mahdollistaa myös RAIDZ2:en, joka sallii kahden levyn samanaikaisen hajoamisen. Erään testin mukaan Buffalo lukee 20Mt/s ja kirjoittaa vaivaiset 3.3 Mt/s. Oma NAS boksini hakaa tämän siis nopeudessa 6-0.

FAQ: Mitä etuja ZFS tarjoaa?

Solaris tarjoaa ZFS:än, joka on monella tavalla parempi kuin Linuxin RAID ja sen tiedostojärjestelmät:
ZFS koostuu storagepoolista. Yksi pooli sisältää yhden tai useamman levysetin. Levysetti voi olla joko yksittäinen levy, peilattu levypari (tai usempi levy peilattuna keskenään), kolme tai useampi levy laitettuna raidz1:llä (Solariksen vastine RAID-5:lle), tai neljä tai useampi levy laitettuna raidz2:lla (mahdollistaa kahden levyn hajoamisen). Jos poolista loppuu levytila, niin tarvitsee ainoastaan lisätä uusi levysetti pooliin ja avot. ZFS tarjoaa myös tiedostojärjestelmän, joita on helppo muodostaa lennossa, vaikka oma jokaiselle käyttäjälle.

Linuxissa vastaava vaatisi RAID:in, LVM:n ja tiedostojärjestelmän käyttöä yhdessä. Jos linuxissa loppuu levytila, niin pitäisi lisätä uusi levysetti, liittää levysetti LVM:ään, kasvattaa LVM:ssä luodun partition kokoa ja lopuksi kasvattaa partitiolla olevan tiedostojärjestelmän kokoa. Hankalaa ja monivaiheista. Lisäksi ZFS:ssä kaikki tiedostojärjestelmät jakavat yhdessä levypoolin levytilan. Linuxissa eri tiedostojärjestelmät tarvitsevat oman partition (joka tehtäisiin LVM:llä) ja jos yksi tiedostojärjestelmä sisältää paljon hukkatilaa, mutta muut ovat täynnä, niin on pakko lisätä uutta levytilaa ja kasvattaa täysien partitioiden kokoa LVM:llä. ZFS:llä siis kaikki tiedostojärjestelmät jakavat saman tilan, jolloin hukkatilaa ei jää (ellei erikseen määritellä tiedostojärjestelmäkohtaisia quotoja, eli levytilarajoituksia)

Lisäksi ZFS suojaa paremmin levyvirheiltä.